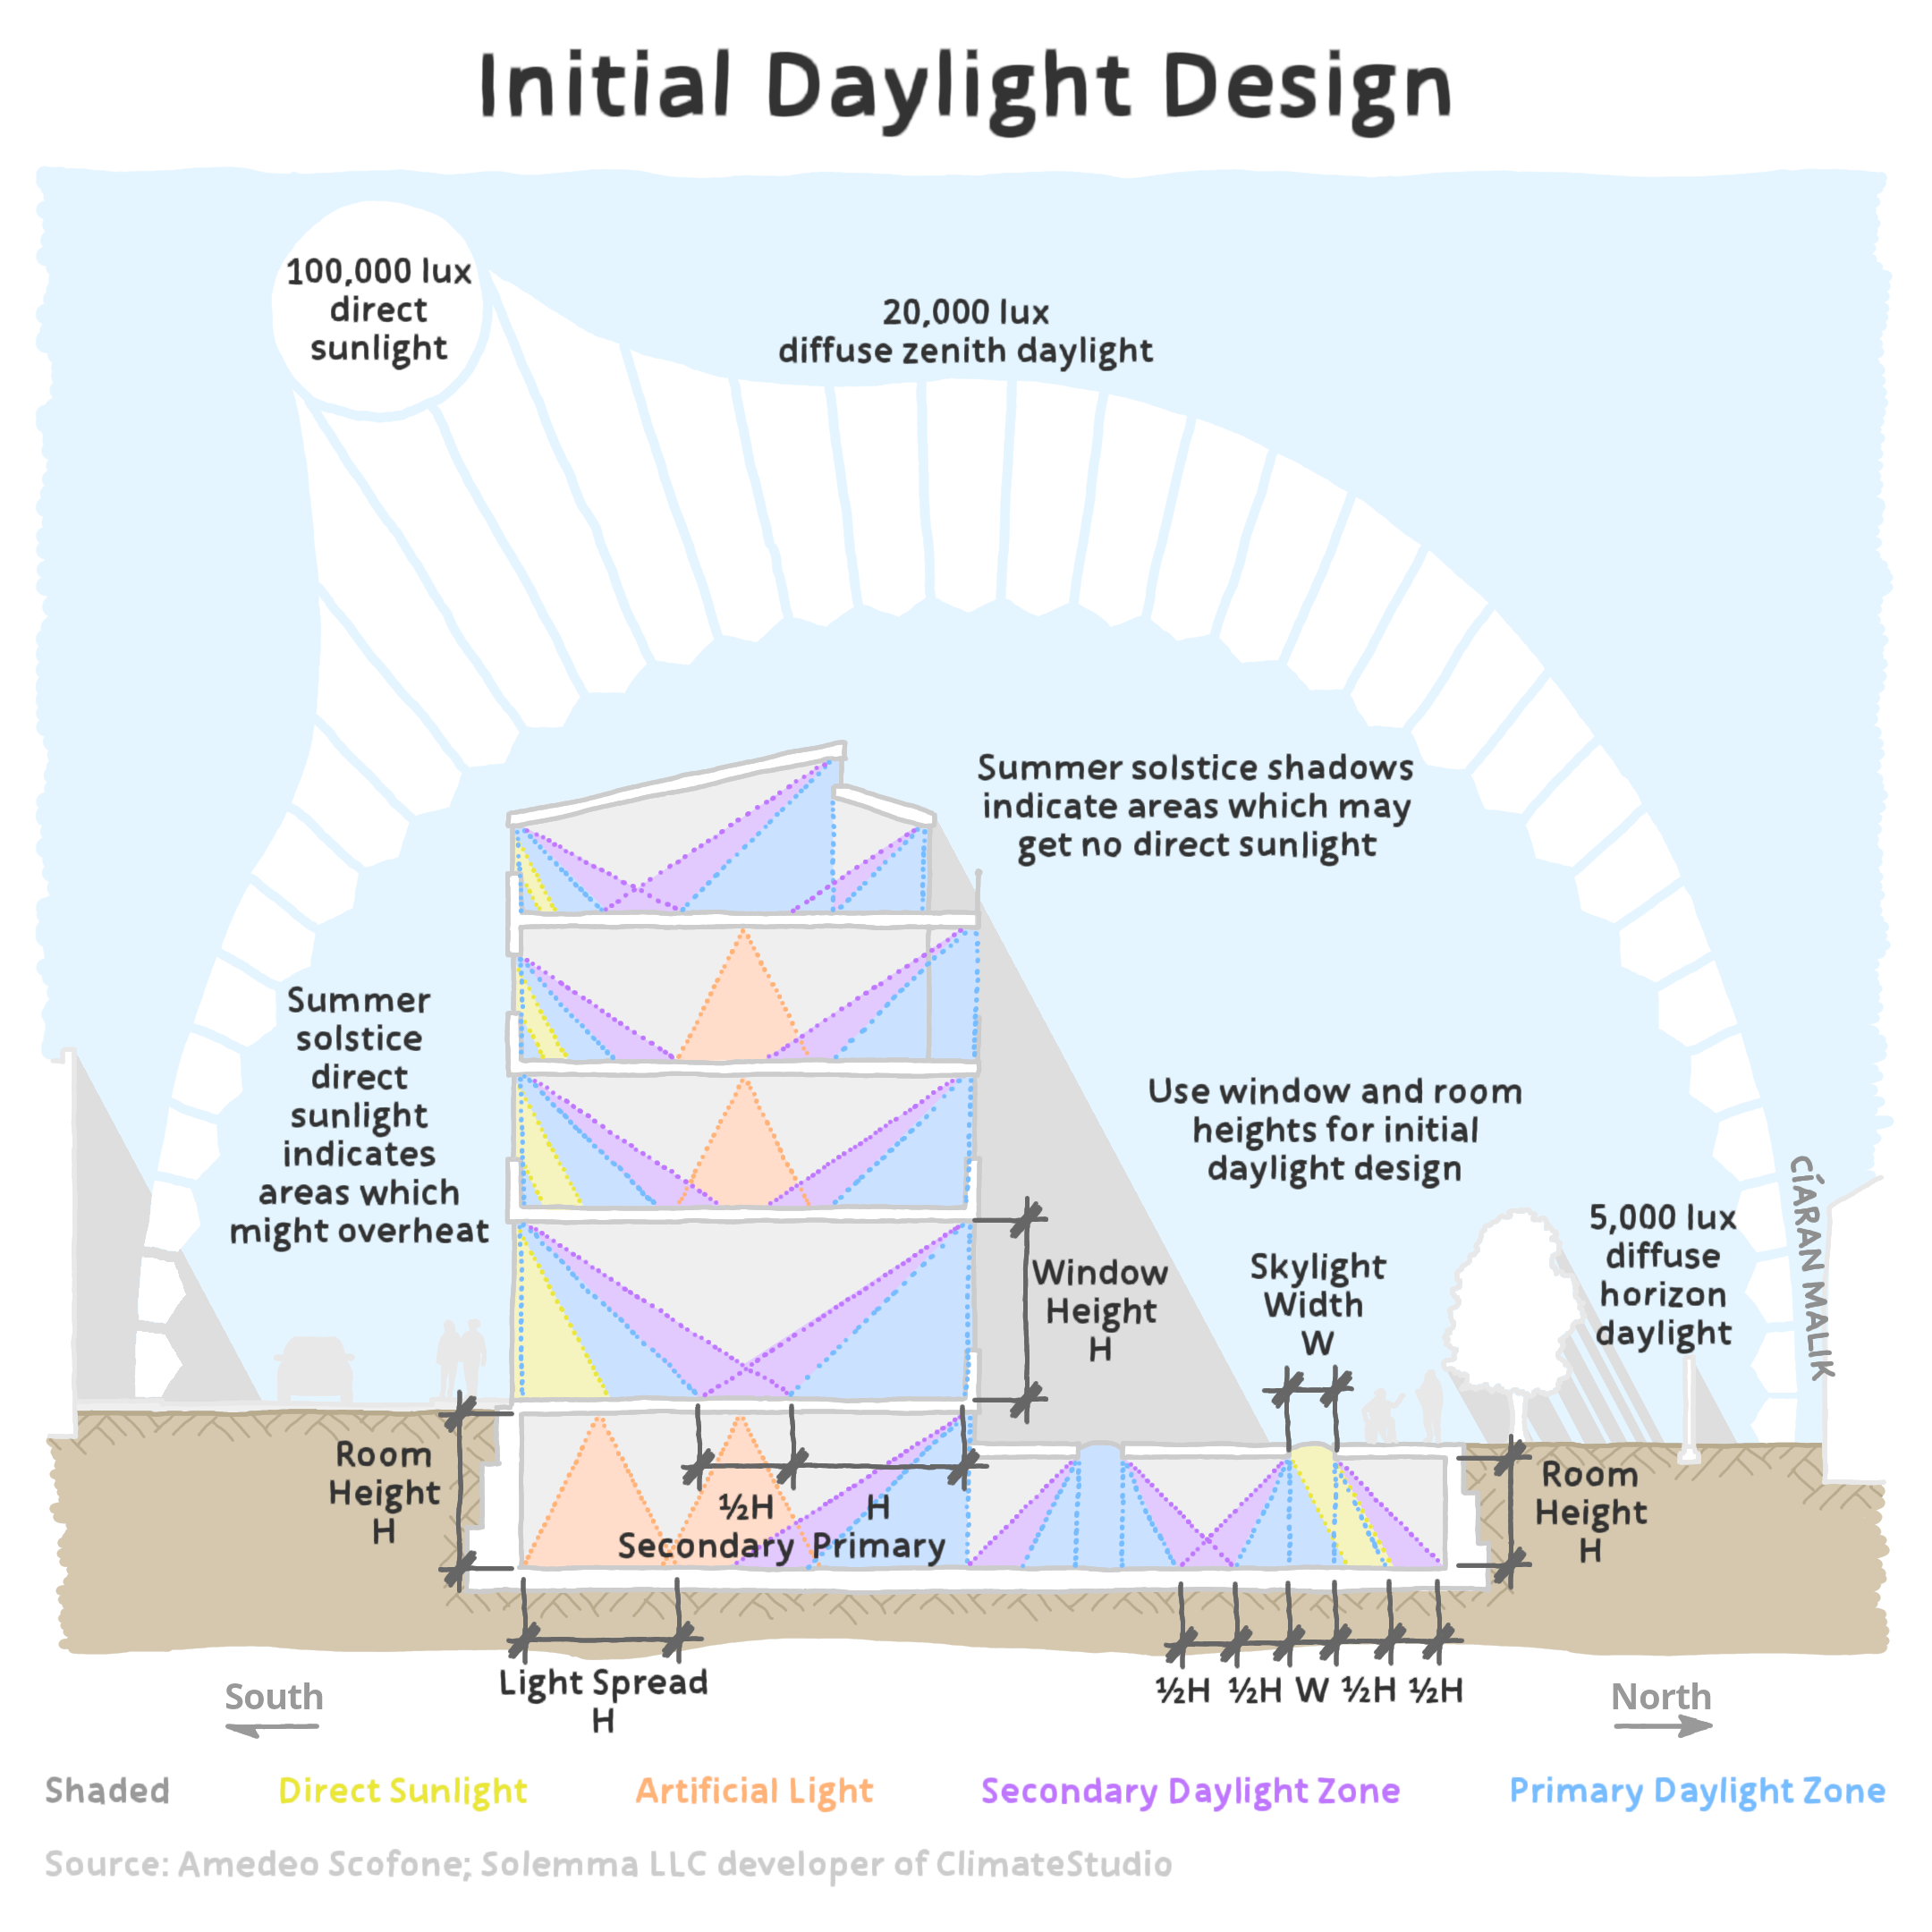
It’s starting to get dark again and it’s been a while since I’ve shared a new diagram… so here is one on daylight design! 🌞
Daylight design depends on lots of factors; orientation, obstructions, weather, window surface, reflection from outdoor surface, reflection from internal surfaces, internal objects and more. But here are my five key points for initial design:
1. Mapping the sun position isn’t daylight design:
Light does come from the sun. But most of the light that lights a room is diffuse light from the sky. It is useful to map the sun position to position surfaces to capture heat and energy. It is useful to map (especially in the summer) to provide shading to avoid overheating and glare from too much light.
2. Daylight is about the sky:
When you’re at a window and can see the sky, then that room is getting direct daylight. The amount of light is different depending on whether the window points straight up, outwards with a large view or is in an alley which can only see a thin strip of sky.
3. Initial daylight depth from window height
You can initially plan which spaces will have daylight using the height of the window. If the window is 3m tall, then the daylight will mainly light the space 3m from the window, called a primary daylight zone. After that there is a secondary daylight zone, half the height of the window (1.5m if the window is 3m tall) with a lower but usable light level. The rest of the room isn’t in darkness, but the light level will be lower than by the window and may need topping up with artificial lights.
4. Shade skylights in summer to avoid overheating
Skylights are a great way to get light into long rooms or spaces underground. For initial design you can draw the primary daylight zone as half the height of the space and the secondary daylight zone as another half. But as the sun gets higher in the summer, more direct sunlight can enter the space and lead to overheating, so they might need shading in the summer.
5. Areas without daylight will need artificial light
Areas not in the primary or secondary daylight zone will need artificial light even in the daytime. This might help you plan where to place toilets and storage which aren’t used very often.
Hopefully this helps you get started.
A big thank you to Amedeo Scofone for discussions about this and Solemma LLC developer of ClimateStudio used to test these rules of thumb 🌟 Thank you to Francesco Anselmo for every chat about light. 🌟
You can see more of my diagrams here.

